
1. Pokrenite XAMPP. Pokrenite Apache i MySQL klikom na Start dugme.
2. Otvorite phpMyAdmin, kliknite na Admin u liniji MySQL-a ili ukucajte u address bar http://localhost/phpmyadmin/.
3. Kliknite na karticu Databases, u prvo polje upisite ime baze podataka, u ovom primeru, oc-prodavnica, a u drugo polje odaberite odgovarajuci Collation, u ovom primeru, utf8_unicode_ci, pa klik na dugme Create.

4. Idite u htdocs folder XAMPP-a. C:/xampp/htdocs i napravite folder sa imenom vase baze podataka, u ovom primeru, oc-prodavnica.
5. Skinite zeljenu verziju OpenCart. Raspakujte.


6. Otvorite upload folder, u ovom primeru, opencart-2.1.0.1/opencart-2.1.0.1/upload. Kopirajte sav sadrzaj i prekopirajte u oc-prodavnica folder (iz koraka 4.).


7. Preimenujte config-dist.php u config.php.


8. Preimenujte config-dist.php u config.php, u admin folderu, oc-prodavnica foldera.


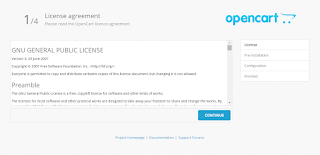
9. U address bar ukucajte ime vaseg hosta, ime foldera, u ovom primeru, http://locahost/oc-prodavnica, pa Enter. Zatim kliknite na Continue.

10. Proverite da li je sve u zeleno i u Statusu - Writable. Ako jeste, klik na Continue.

11. Postoji opcija da vam nedostaje cURL, sa crvenim minus znakom.

U tom slucaju, idite u php folder XAMPP-a, C:/xampp/php i otvorite php.ini fajl, u Notepad, Notepad++ ili Sublime Text 2.

Pritisnite CTRL+F i upisite "curl". Obrisite tacku-zarez u liniji extension=php_curl.dll. Zatim CTRL+S da sacuvajte fajl.


Otvorite XAMPP kontrol panel. Stopirajte Apache klikom na Stop dugme. Pokrenite Apache klikom na Start dugme.

Vratite se na stranicu sa instalacijom i pritisnite F5 na tasturi da osvezite stranicu.

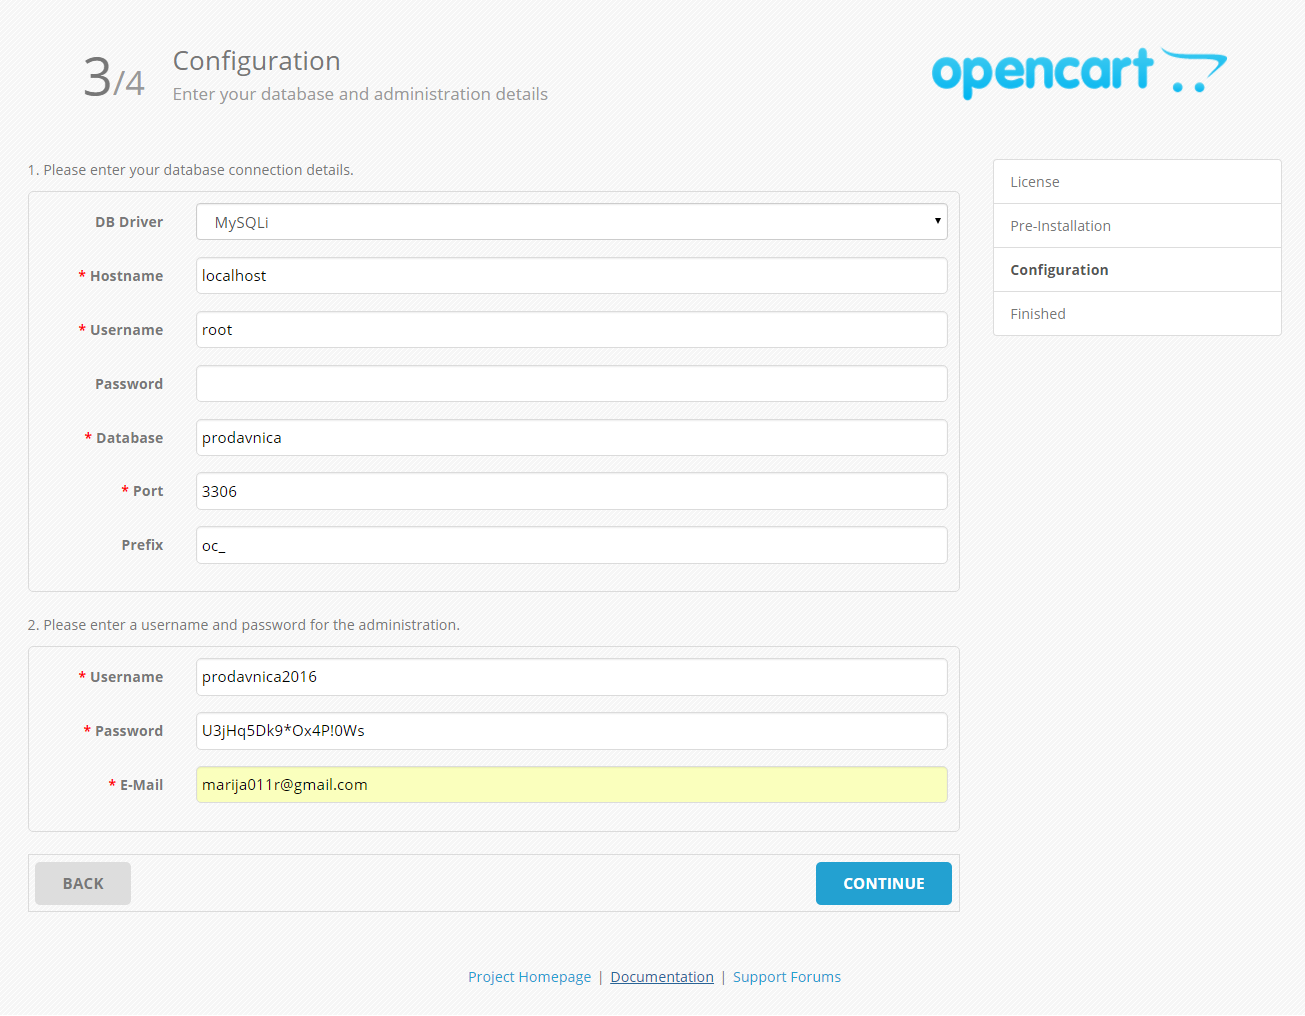
12. Popunite podatke za vasu prodavnicu, pa klik na Continue. Opcionalno - otvorite tekst dokument, sacuvajte ga, a u njega upisite:
verzija: OPENCART 2.0.1.1
Za bazu podataka
---------------------
ime-baze-podataka: oc-prodavnica
Sledece dve opcije, ako ste napravili korisnika u phpmyadmin-u.
korisnicko ime: vase korisnicko ime
lozinka: vasa lozinka
Ako niste napravili korisnika.
korisnicko ime: root
lozinka: ostavite prazno
Za admin
------------
korisnicko ime: prodavnica2016
lozinka: sastavite lozinku
email: vas email
CTRL i S da sacuvate dokument. Prekopirajte na USB ili eksterni hard disk.


13. Vratite se u oc-prodavnica folder, u htdocs folderu XAMPP-a, C:/xampp/htdocs/oc-prodavnica. Obrisite folder install.


14. Otvorite vasu prodavnicu i admin panel u pretrazivacu.


15. Vasa prodavnica - ime hosta, ime foldera, u ovom primeru,
http://localhost/oc-prodavnica
Vas admin panel za prijavu u vasu prodavnicu - ime hosta, ime foldera, i admin, u ovom primeru, http://localhost/oc-prodavnica/admin/
16. Taa daaa :)
1. Start XAMPP. Start Apache and MySQL by clicking the Start button.
2. Open phpMyAdmin, click Admin in line of MySQL or type in the address bar
http://localhost/phpmyadmin/.
3. Click the tab Databases, in the first field, enter the name of the database, in this example, oc-prodavnica, and in the second field, select the appropriate Collation, in this example, utf8_unicode_ci, and click on the Create button.

4. Go to the htdocs folder of XAMPP. C:/xampp/htdocs and create a folder with name same as your database, in this example, oc-prodavnica.
5. Download the desired version of OpenCart. Unpack.


6. Open the upload folder, in this example, opencart-2.1.0.1/ opencart-2.1.0.1/upload. Copy all content and paste it the oc-prodavnica folder (from step 4.).


7. Rename config-dist.php in config.php.


8. Rename config-dist.php in config.php in admin folder, of oc-prodavnica folder.


9. In the address bar, type the name of your host, folder name, in this example,
http://locahost/oc-prodavnica and press Enter. Then click Continue.
10. Make sure that everything is green and Status - Writable. If so, click Continue.

11. There is option that you are missing cURL, with a red minus sign.

In this case, go to the php folder of XAMPP, C:/xampp/php and open the php.ini file in Notepad, Notepad ++ or Sublime Text 2.

Press CTRL+F and type "curl". Delete the semicolon in the line
extension=php_curl.dll. Then CTRL+S to save the file.


Open XAMPP Control Panel. Stop the Apache clicking the Stop button. Start Apache by clicking the Start button.

Go back to the installation and press F5 on keyboard to refresh the page.

12. Complete data for your store, and click Continue. Optional - open the text file, save it, and enter in it:
Version: OpenCart 2.0.1.1
For the database
---------------------
name-of-database: oc-prodavnica
The next two options are only if you created user in phpMyAdmin.
username: your username
password: your password
If you did not create a user in phpMyAdmin .
username: root
password: leave blank
For admin
------------
username: prodavnica2016
password: create a password
Email: your email
CTRL+S to save a document. Copy to USB or external hard drive.


13. Get back to the oc-prodavnica folder in htdocs folder of XAMPP,
C:/xampp/htdocs/oc-prodavnica. Delete install folder.


14. Open your shop and the admin panel in the browser.

15. Your store - host name, folder name, in this example,
http://localhost/oc-prodavnica
Your admin panel for login to your shop - the host name, folder name, and admin, in this example, http://localhost/oc-prodavnica/admin/
16. Taa Daa :)
2. Otvorite phpMyAdmin, kliknite na Admin u liniji MySQL-a ili ukucajte u address bar http://localhost/phpmyadmin/.
3. Kliknite na karticu Databases, u prvo polje upisite ime baze podataka, u ovom primeru, oc-prodavnica, a u drugo polje odaberite odgovarajuci Collation, u ovom primeru, utf8_unicode_ci, pa klik na dugme Create.

4. Idite u htdocs folder XAMPP-a. C:/xampp/htdocs i napravite folder sa imenom vase baze podataka, u ovom primeru, oc-prodavnica.
5. Skinite zeljenu verziju OpenCart. Raspakujte.

6. Otvorite upload folder, u ovom primeru, opencart-2.1.0.1/opencart-2.1.0.1/upload. Kopirajte sav sadrzaj i prekopirajte u oc-prodavnica folder (iz koraka 4.).


7. Preimenujte config-dist.php u config.php.


8. Preimenujte config-dist.php u config.php, u admin folderu, oc-prodavnica foldera.


9. U address bar ukucajte ime vaseg hosta, ime foldera, u ovom primeru, http://locahost/oc-prodavnica, pa Enter. Zatim kliknite na Continue.

10. Proverite da li je sve u zeleno i u Statusu - Writable. Ako jeste, klik na Continue.

11. Postoji opcija da vam nedostaje cURL, sa crvenim minus znakom.

U tom slucaju, idite u php folder XAMPP-a, C:/xampp/php i otvorite php.ini fajl, u Notepad, Notepad++ ili Sublime Text 2.

Pritisnite CTRL+F i upisite "curl". Obrisite tacku-zarez u liniji extension=php_curl.dll. Zatim CTRL+S da sacuvajte fajl.


Otvorite XAMPP kontrol panel. Stopirajte Apache klikom na Stop dugme. Pokrenite Apache klikom na Start dugme.
Vratite se na stranicu sa instalacijom i pritisnite F5 na tasturi da osvezite stranicu.

12. Popunite podatke za vasu prodavnicu, pa klik na Continue. Opcionalno - otvorite tekst dokument, sacuvajte ga, a u njega upisite:
verzija: OPENCART 2.0.1.1
Za bazu podataka
---------------------
ime-baze-podataka: oc-prodavnica
Sledece dve opcije, ako ste napravili korisnika u phpmyadmin-u.
korisnicko ime: vase korisnicko ime
lozinka: vasa lozinka
Ako niste napravili korisnika.
korisnicko ime: root
lozinka: ostavite prazno
Za admin
------------
korisnicko ime: prodavnica2016
lozinka: sastavite lozinku
email: vas email
CTRL i S da sacuvate dokument. Prekopirajte na USB ili eksterni hard disk.

13. Vratite se u oc-prodavnica folder, u htdocs folderu XAMPP-a, C:/xampp/htdocs/oc-prodavnica. Obrisite folder install.


14. Otvorite vasu prodavnicu i admin panel u pretrazivacu.


15. Vasa prodavnica - ime hosta, ime foldera, u ovom primeru,
http://localhost/oc-prodavnica
Vas admin panel za prijavu u vasu prodavnicu - ime hosta, ime foldera, i admin, u ovom primeru, http://localhost/oc-prodavnica/admin/
16. Taa daaa :)
1. Start XAMPP. Start Apache and MySQL by clicking the Start button.
2. Open phpMyAdmin, click Admin in line of MySQL or type in the address bar
http://localhost/phpmyadmin/.
3. Click the tab Databases, in the first field, enter the name of the database, in this example, oc-prodavnica, and in the second field, select the appropriate Collation, in this example, utf8_unicode_ci, and click on the Create button.

4. Go to the htdocs folder of XAMPP. C:/xampp/htdocs and create a folder with name same as your database, in this example, oc-prodavnica.
5. Download the desired version of OpenCart. Unpack.

6. Open the upload folder, in this example, opencart-2.1.0.1/ opencart-2.1.0.1/upload. Copy all content and paste it the oc-prodavnica folder (from step 4.).


7. Rename config-dist.php in config.php.


8. Rename config-dist.php in config.php in admin folder, of oc-prodavnica folder.


9. In the address bar, type the name of your host, folder name, in this example,
http://locahost/oc-prodavnica and press Enter. Then click Continue.

10. Make sure that everything is green and Status - Writable. If so, click Continue.

11. There is option that you are missing cURL, with a red minus sign.

In this case, go to the php folder of XAMPP, C:/xampp/php and open the php.ini file in Notepad, Notepad ++ or Sublime Text 2.

Press CTRL+F and type "curl". Delete the semicolon in the line
extension=php_curl.dll. Then CTRL+S to save the file.


Open XAMPP Control Panel. Stop the Apache clicking the Stop button. Start Apache by clicking the Start button.
Go back to the installation and press F5 on keyboard to refresh the page.

12. Complete data for your store, and click Continue. Optional - open the text file, save it, and enter in it:
Version: OpenCart 2.0.1.1
For the database
---------------------
name-of-database: oc-prodavnica
The next two options are only if you created user in phpMyAdmin.
username: your username
password: your password
If you did not create a user in phpMyAdmin .
username: root
password: leave blank
For admin
------------
username: prodavnica2016
password: create a password
Email: your email
CTRL+S to save a document. Copy to USB or external hard drive.


C:/xampp/htdocs/oc-prodavnica. Delete install folder.


14. Open your shop and the admin panel in the browser.


15. Your store - host name, folder name, in this example,
http://localhost/oc-prodavnica
Your admin panel for login to your shop - the host name, folder name, and admin, in this example, http://localhost/oc-prodavnica/admin/
16. Taa Daa :)

No comments:
Post a Comment